エレメンタプロのポストウィジェットを使用して、投稿またはカスタム投稿タイプの投稿をリスト全体またはカテゴリ別にリスト形式またはグリッド形式で表示できます。 ポストリストでサムネイルをクリックすると、その投稿に移動します。 Elementorのサイト設定でライトボックス機能を有効にできますが、その画像URLにリンクが設定されている場合にのみ機能します。
エレメンター Posts ウィジェットで最新の文やカテゴリ文を表示するとき、サムネイル(特性画像)をクリックすると、ライトボックス画像として表示させたい場合は、以下に設定した方法で試すことができます。
エレメントポストウィジェット:画像をライトボックスとして表示する
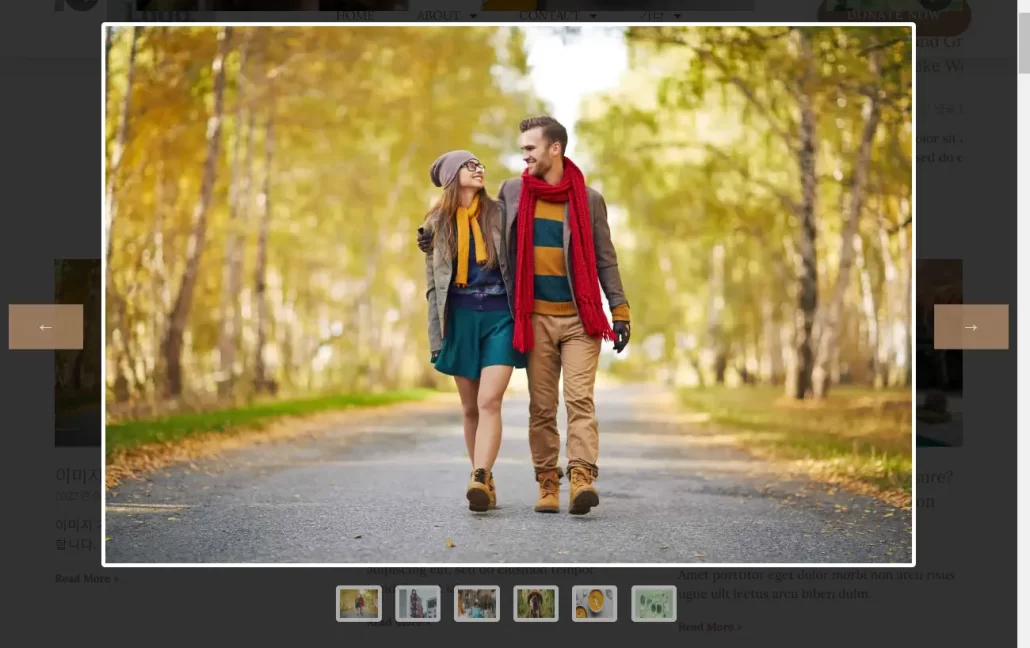
上記の動画のように エレメンページビルダーのPostsウィジェットで表示したポストリストでサムネイルをクリックするとライトボックス画像として表示され、ライトボックス内のサムネイルアイコンをクリックするとその画像が表示されるようにする方法を見てみましょう。
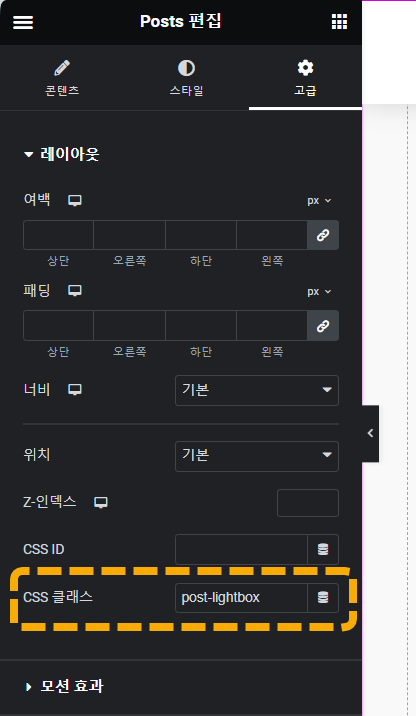
- まず、Postsウィジェットの編集パネルで Advanced タブをクリックし、CSSクラスに post-lightboxを指定します。
- そのページでHTMLウィジェットを追加し、次のHTMLコードを追加します。
<div id="lightbox">
<img id="lightbox-img" src="">
<div id="lightbox-thumbnails"></div>
<button id="lightbox-prev" class="lightbox-arrow">←</button>
<button id="lightbox-next" class="lightbox-arrow">→</button>
</div>- 高級 タブの下部 カスタムCSS セクションに以下のCSSコードを追加します。
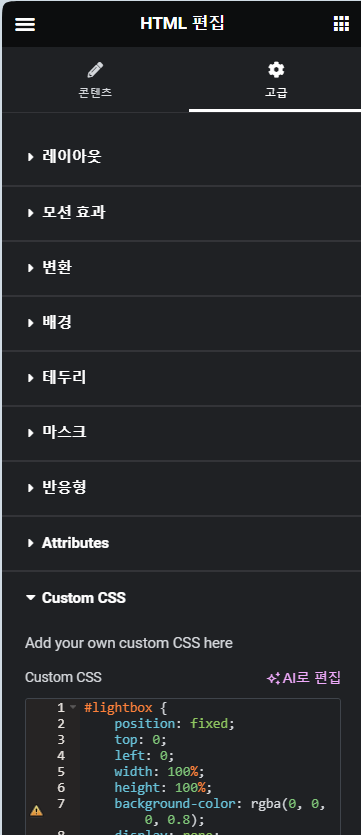
追加するCSSコード:
#lightbox {
    position: fixed;
    top: 0;
    left: 0;
    width: 100%;
    height: 100%;
    background-color: rgba(0, 0, 0, 0.8);
    display: none;
    align-items: center;
    justify-content: center;
    z-index: 9999;
    flex-direction: column;
}

#lightbox img {
    max-width: 80%;
    max-height: 80%;
    border: 5px solid white;
    border-radius: 4px;
}

#lightbox-thumbnails {
    display: flex;
    margin-top: 20px;
}

#lightbox-thumbnails img {
    width: 50px;
    height: 50px; /* Making it square */
    margin: 0 5px;
    cursor: pointer;
    opacity: 0.6;
    transition: opacity 0.3s;
}

#lightbox-thumbnails img:hover {
    opacity: 1;
}

#lightbox:target {
    display: flex;
}

.lightbox-arrow {
    position: absolute;
    top: 50%;
    transform: translateY(-50%);
    background-color: rgba(0, 0, 0, 0.7);
    color: white;
    border: none;
    font-size: 24px;
    cursor: pointer;
    padding: 10px 15px;
    border-radius: 50%;
    z-index: 10;
    opacity: 0.8;
    transition: opacity 0.2s;
}

.lightbox-arrow:hover {
    opacity: 1;
}

#lightbox-prev {
    left: 10px;
}

#lightbox-next {
    right: 10px;
}


#lightbox-img {
    cursor: pointer;
}- 以下のJavaScriptコードを追加してください。
/**
 * Lightbox Enhancement for Elementor Posts Widget:
 *
 * 1. Activates a lightbox when post thumbnails are clicked within the ".post-lightbox" container.
 * 2. The lightbox displays the largest available version of the post's featured image.
 * 3. Thumbnails of all posts are shown at the bottom of the lightbox for navigation.
 * 4. Clicking on any thumbnail in the lightbox will display the corresponding post's featured image.
 * 5. Clicking on the large featured image in the lightbox will redirect to the corresponding post.
 * 6. Previous and next arrow buttons are provided in the lightbox for image navigation.
 *
 * Designed to enhance the viewing experience of Elementor's Posts widget by providing a
 * fullscreen view of post images without leaving the current page, and easy navigation
 * between post images.
 *
 * Note: This script assumes the Elementor widget structure and class naming conventions remain consistent.
 *
 * Elementor Pro의 포스트 위젯 이미지 라이트박스:
 *
 * 1. ".post-lightbox" 컨테이너 내의 포스트 썸네일을 클릭하면 라이트박스가 활성화됩니다.
 * 2. 라이트박스는 포스트의 특징 이미지 중 가장 큰 버전을 표시합니다.
 * 3. 라이트박스 하단에 모든 포스트의 썸네일이 내비게이션을 위해 표시됩니다.
 * 4. 라이트박스 내의 어떤 썸네일을 클릭하면 해당 포스트의 특징 이미지가 표시됩니다.
 * 5. 라이트박스 내의 큰 특징 이미지를 클릭하면 해당 포스트로 리디렉션됩니다.
 * 6. 이미지 내비게이션을 위해 라이트박스에 이전 및 다음 화살표 버튼이 제공됩니다.
 *
 * 현재 페이지를 벗어나지 않고 포스트 이미지의 전체 화면 보기를 제공하고,
 * 포스트 이미지 간의 쉬운 내비게이션을 통해 Elementor의 포스트 위젯의 시청 경험을 향상시키도록 설계되었습니다.
 *
 * 참고: 이 스크립트는 Elementor 위젯 구조와 클래스 명명 규칙이 일관되게 유지된다고 가정합니다.
 */

document.addEventListener("DOMContentLoaded", function() {
    // Variables
    var lightbox = document.getElementById('lightbox');
    var lightboxImg = document.getElementById('lightbox-img');
    var thumbnailsContainer = document.getElementById('lightbox-thumbnails');
    var prevButton = document.getElementById('lightbox-prev');
    var nextButton = document.getElementById('lightbox-next');
    var currentPostURL = '';

    var thumbnails = document.querySelectorAll('.post-lightbox .elementor-post__thumbnail__link');
    var currentIndex = 0; // This will keep track of the current displayed image in the lightbox

    // Show the largest image in the lightbox when clicking on a thumbnail
    thumbnails.forEach(function(thumbnail, index) {
        thumbnail.addEventListener('click', function(e) {
            e.preventDefault();

            var images = thumbnail.querySelector('img').getAttribute('srcset').split(',').map(function(item) {
                var parts = item.trim().split(' ');
                return {
                    url: parts[0],
                    width: parseInt(parts[1], 10)
                };
            });

            images.sort(function(a, b) {
                return b.width - a.width;
            });

            var largestImageSrc = images[0].url;

            lightboxImg.src = largestImageSrc;
            currentPostURL = thumbnail.href; // Store the post's URL
            lightbox.style.display = 'flex'; // Show the lightbox

            currentIndex = index; // Update the current index
        });

        // Create a thumbnail icon for each post
        var imgSrc = thumbnail.querySelector('img').getAttribute('src');
        var icon = document.createElement('img');
        icon.src = imgSrc;
        icon.style.width = '50px';
        icon.style.height = '50px'; // Square thumbnail icons
        icon.style.marginRight = '10px';
        icon.classList.add('thumbnail-icon');
        thumbnailsContainer.appendChild(icon); // Append to the thumbnails container

        icon.addEventListener('click', function(e) {
            e.stopPropagation(); // Prevent the lightbox from closing

            // Update the main lightbox image when clicking on a thumbnail icon
            var images = thumbnails[index].querySelector('img').getAttribute('srcset').split(',').map(function(item) {
                var parts = item.trim().split(' ');
                return {
                    url: parts[0],
                    width: parseInt(parts[1], 10)
                };
            });

            images.sort(function(a, b) {
                return b.width - a.width;
            });

            lightboxImg.src = images[0].url;
            currentPostURL = thumbnails[index].href; // Store the post's URL
            currentIndex = index; // Update the current index
        });
    });

    // Navigate to the previous image when clicking on the prev button
    prevButton.addEventListener('click', function(e) {
        e.stopPropagation();
        currentIndex = (currentIndex - 1 + thumbnails.length) % thumbnails.length;
        displayImage(currentIndex);
    });

    // Navigate to the next image when clicking on the next button
    nextButton.addEventListener('click', function(e) {
        e.stopPropagation();
        currentIndex = (currentIndex + 1) % thumbnails.length;
        displayImage(currentIndex);
    });

    // A helper function to display an image in the lightbox given its index
    function displayImage(index) {
        var thumbnail = thumbnails[index];
        var images = thumbnail.querySelector('img').getAttribute('srcset').split(',').map(function(item) {
            var parts = item.trim().split(' ');
            return {
                url: parts[0],
                width: parseInt(parts[1], 10)
            };
        });

        images.sort(function(a, b) {
            return b.width - a.width;
        });

        lightboxImg.src = images[0].url;
        currentPostURL = thumbnail.href; // Update the post's URL
    }

    // Close the lightbox when clicking anywhere inside it, except on the main image
    lightbox.addEventListener('click', function() {
        lightbox.style.display = 'none';
    });

    // Redirect to the post when clicking on the main lightbox image
    lightboxImg.addEventListener('click', function(e) {
        e.stopPropagation(); // Prevent the lightbox from closing
        window.location.href = currentPostURL; // Navigate to the post
    });
});
JavaScriptを追加する方法はさまざまです。 この記事を参照してJavaScriptコードをロードすることをお勧めします。 簡単な方法で WPコードのようなHeader&Footerプラグインをインストールし、フッター領域に上記のコード( ... 追加)を追加できます。
Postsウィジェットのポストリストでサムネイルをクリックすると、次のようにポップアップで画像が全画面表示されます。 ページネーションを表示しても、そのページでうまく機能します。
最後に、
以上で、エレメントの投稿リストでサムネイルをクリックしたときにライトボックスとして表示されるようにする方法について説明しました。 次に機会になったときにポストウィジェットをポストスライダーに置き換える方法について説明します。

コメントを残す