この記事では、 エレガント ThemesのDiviテーマメニューの背景色を透明に設定する方法について詳しく見て、スクロール時のメニューの背景色を変更する方法も説明します。 そして、ページごとに異なる背景色を適用する方法について説明します。
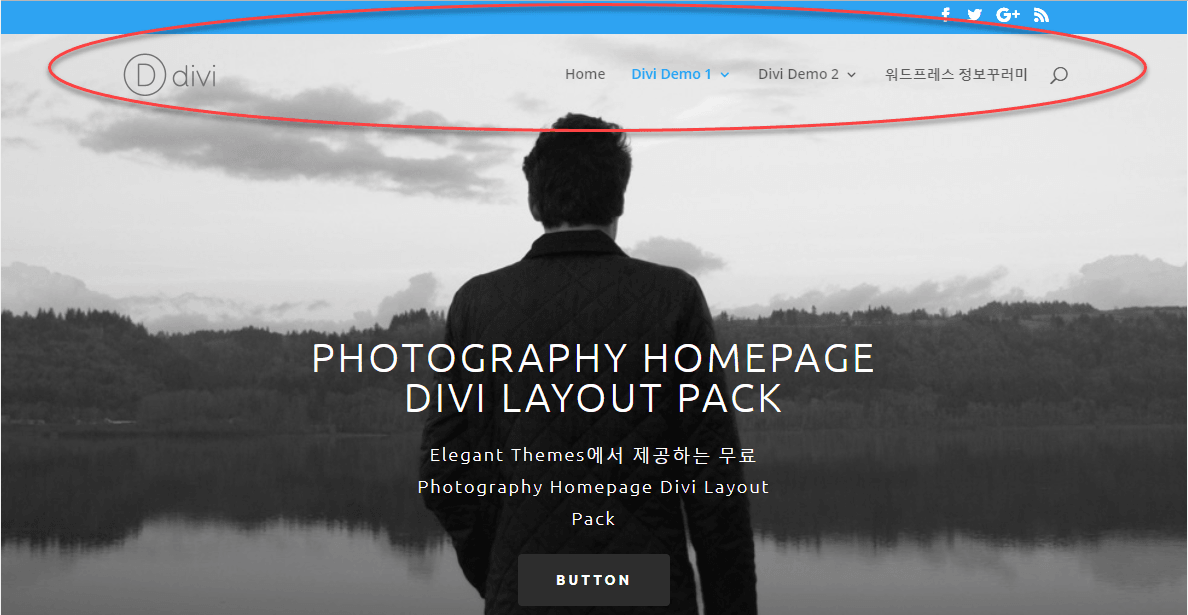
Diviメニューの背景色を透明に指定すると、ヘッダーの下に配置された全体の幅節(Full Width Section)モジュールの背景画像や背景色がヘッダーに適用されます。

Diviテーマのメニューの背景色を透明に設定する方法
エレガント ThemesのDiviテーマでメニューの背景色を透明に設定すると、メニューのすぐ下の背景色または画像がメニュー領域に拡大されます。
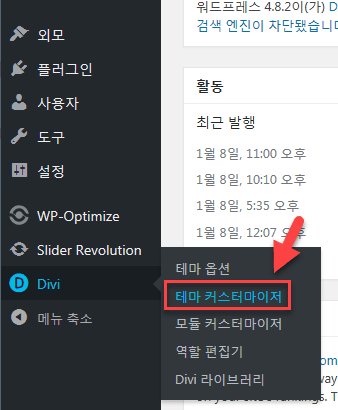
Diviテーマで、メニューの背景色を透明にするには、まず Divi>テーマカスタマイザー(Theme カスタマイザ)をクリックします。
表示される画面で、 ヘッダーとナビゲーション(Header&Navigation)>メインメニューバー(Primary Menu Bar)をクリックします。
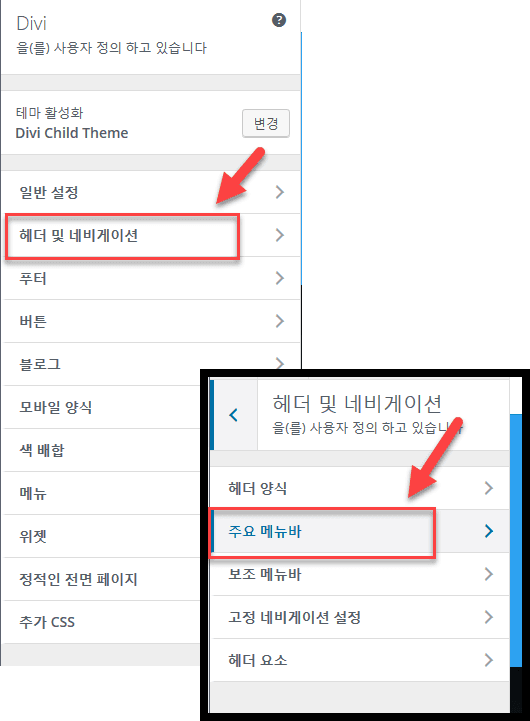
その後、メインメニューバーのオプションを設定することができる画面が表示されます。
背景色(BACKGROUND COLOR) 部分を 「色の選択」(Select Color)を選択します。
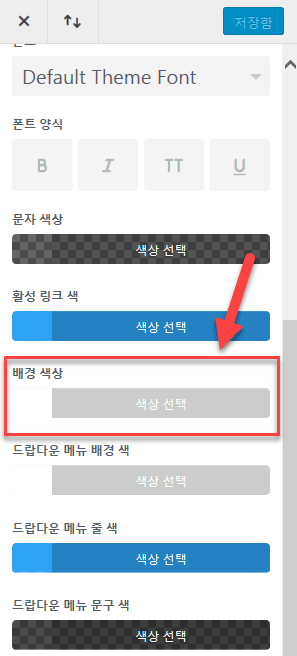
背景色を指定できるように色を選択ツールが表示されます。
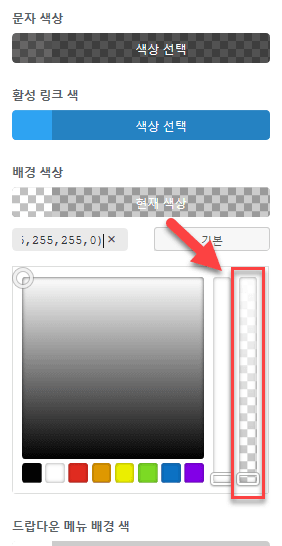
右端のバーでの透明度を指定することができます。 正方形の形のアイコンを下にドラッグし下げるメニューの背景色が完全に透明になります。 メニューの背景を透明にする場合は、メニュー項目のテキストの色も適切に調整するようにします。
保存した後にサイトを見てみると、次の図のようにメニュー部分が透明になります。
このプロセスをYouTubeのビデオを介して確認することができます(英語)。
スクロール時のメニューの背景色を変更する
上記のプロセスに応じてメニューの背景色を透明に作っメニューが上部に固定されるように設定した場合は、ページをスクロールすると、メニューの部分が透明なっメニュー項目がよく見えないことがあります。
この場合、マウスで画面をスクロールすると、メニューの背景色が特定の色に変化するように設定することができます。
まず、 Divi>テーマオプション(Theme オプション)をクリックして、 Integration(統合) タブをクリックします。
あなたのブログの<head>にコードを追加する(Add code to the < head > of your blog)次のjQueryのスクリプトコードを追加します。
<script type="text/javascript">
(function($) {
var cover_section = '#cover-section',
top_header = '#top-header, #et-secondary-nav',
header = '#main-header';
$(window).bind('scroll', function() {
if ($(window).scrollTop() > 0) {
$(header).addClass('opaque-header');
$(header).removeClass('transparent-header');
$(top_header).addClass('opaque-header');
$(top_header).removeClass('transparent-header');
} else {
$(header).removeClass('opaque-header');
$(header).addClass('transparent-header');
$(top_header).removeClass('opaque-header');
$(top_header).addClass('transparent-header');
}
});
$(document).ready(function() {
top_header = '#top-header, #et-secondary-nav';
header = '#main-header';
$(header).addClass('transparent-header');
$(top_header).addClass('transparent-header');
if ($(cover_section).length) $('body').addClass('cover-active');
});
$(window).load(function() {
if ($(cover_section).length) set_viewport_height($(cover_section));
});
$(window).resize(function() {
if ($(cover_section).length) set_viewport_height($(cover_section));
});
function set_viewport_height(element) {
var viewport_height = $(window).height();
if ($('#wpadminbar').length) var viewport_height = viewport_height - $('#wpadminbar').innerHeight();
$(element).height(viewport_height);
};
})(jQuery);
</script>
<script type="text/javascript">
(function($) {
$(window).load(function() {
$('#divi-loading').fadeOut(500);
});
})(jQuery);
</script>
//Source: http://www.dallasdesign.uk/blog/changing-menu-colour-on-scroll/
今のスタイルシート(style.css)ファイルに次のCSSコードを追加します。
.opaque-header {
background-color: rgba(31,31,31,0.8) !important;
box-shadow: 0 1px 0 rgba(0, 0, 0, 0.0);
-moz-box-shadow: 0 1px 0 rgba(0, 0, 0, 0.0);
-webkit-box-shadow: 0 1px 0 rgba(0, 0, 0, 0.0);
}
.transparent-header {
background-color: rgba(255, 255, 255, 0.0) !important;
box-shadow: 0 0 0 rgba(0, 0, 0, 0) !important;
}
/* Thanks to Vlad Patrascu for the remaining CSS code */
/* Set all this elements to 100% height, very important! */
/* Set all this elements to 100% height, very important! */
.cover-active, .cover-active #page-container, .cover-active #et-main-area, .cover-active #main-content, .cover-active article.page, .cover-active .entry-content, .cover-active #cover-section .et_pb_slider, .cover-active #cover-section .et_pb_slides, .cover-active #cover-section .et_pb_slide, .cover-active #cover-section .et_pb_container {
min-height: 100%;
height: 100%;
padding: 0!important;
}

/* Set position to initial when boxed layout is set, fixes header position */
.cover-active.et_boxed_layout #page-container {
position: initial!important;
}

/* Prepare slide container for slide description vertical align */
.cover-active #cover-section .et_pb_container {
display: table;
}

/* Align the description on middle vertically (correctly) */
.cover-active #cover-section .et_pb_slide_description {
padding: 0;
display: table-cell;
vertical-align: middle;
}

/* Move dot controllers, in case they are used */
.cover-active #cover-section .et-pb-controllers {
bottom: 100px;
}
Diviテーマで、次のいずれかの方法CSSコードを追加することができます。
- Divi>テーマオプション> Generalの下のユーザーカスタマイズCSS(一番下の)ボックスに追加
- WordPress ダッシュボードから ルックス>ユーザー定義>追加CSSにCSSを追加
- チャイルドテーマのスタイルシートファイルに追加
全体の幅節(Full Width Section) モジュールに次のCSS IDを追加します。
- CSS ID:cover-section
全体の幅節モジュールを追加します。 その後、 http://southcoastjazz.co.uk/ サイトのようにメニューが透明状態では、スクロール時の背景色が変わります。
ページごとに異なるメニューの背景色を適用する
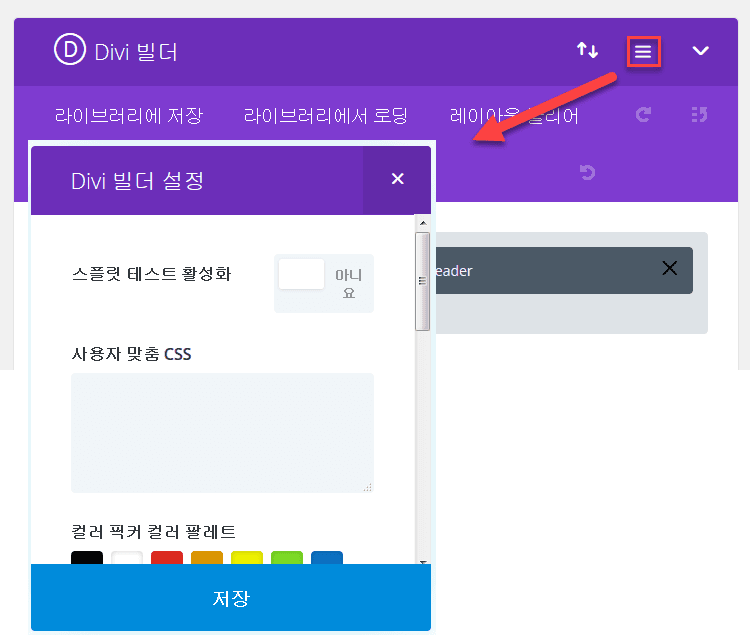
ページごとに異なるメニューの背景色を指定するには、 Divi>テーマ・カスタマイザー>ヘッダーとナビゲーション>ヘッダフォームから 기본を選択し、上記の説明に基づいてメニューの背景色を指定します。 次に、メニューの背景色を変更したいページを開いて、DiviビルダーでXNUMX行のアイコン(下図参照)をクリックします。
ユーザーカスタムCSSに次のようなコードを追加します。
#main-header {
background: #474f61;
}
カラーコードは、適切に変更するようにします。
コメントを残す